Inlays

Contrasting woods can be used to transform an ordinary stool into a personalized piece of art, through the use of inlays.  

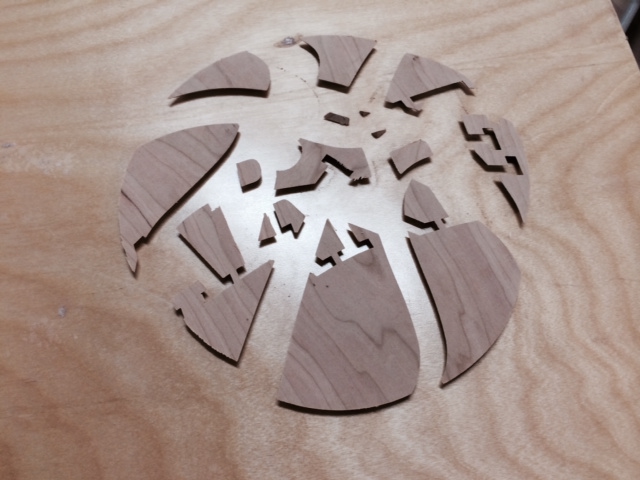
Using a picture as a template, lines are carefully traced into vectors, which are then cut into the stool top (making 'pockets' in the stool top, about 3mm deep).  These same vectors are then used to cut the inlay from a contrasting wood, and this inlay is glued into the pocket in the stool top.  Using different woods and grains in multiple steps, its possible to create complex and beautiful inlays.  The logo below (shown on the finished stool above) was created using purpleheart, cherry, and black walnut on a maple stool top.  The picture below shows the unfinished inlay, and several applications of an oil finish brings out more contrast in the natural colours of the wood.  As the different woods age the colours will become deeper and richer, giving more depth and character to the inlay.  For this reason I always prefer to use natural finishes rather than stains on my work.

Below is a series of pictures showing the process of creating a beautiful inlay from 4 rather ordinary woods.

Starting with a maple top, the first pocket is cut.  The lettering will have a maple background, so the maple is preserved around the letters.

Starting with a maple top, the first pocket is cut.  The lettering will have a maple background, so the maple is preserved around the letters.

Starting with a maple top, the first pocket is cut.  The lettering will have a maple background, so the maple is preserved around the letters.

The basketball is cut from cherry, and glued in place.

The basketball is cut from cherry, and glued in place.

Next, pockets are cut for the walnut lines to create the markings on the basketball.  Care is taken not to cut into the maple lettering.

Next, pockets are cut for the walnut lines to create the markings on the basketball.  Care is taken not to cut into the maple lettering.

The walnut is then cut and carefully glued in place.

The walnut is then cut and carefully glued in place.

Purpleheart is used to outline the letters, giving them nice contrast.

Purpleheart is used to outline the letters, giving them nice contrast.

The completed inlay awaiting a natural oil finish to bring out the contrast in the different woods.

The completed inlay awaiting a natural oil finish to bring out the contrast in the different woods.

Application of a natural oil finish brings out the colour and grain of the different woods, giving a nice contrast that will deepen with age.

Application of a natural oil finish brings out the colour and grain of the different woods, giving a nice contrast that will deepen with age.

Unlike paintings, these inlays will never rub off or fade away with time.  Rather, they are meant to be used, felt, and sat on.  Over time, the woods will age and become more beautiful.  Scratches and dents may occur, but will only add character to a functional piece of art.


Making a rocking chair

Rocking chairs are by far the most difficult and time consuming piece of furniture I make, so I construct them to last for generations (I would hate to waste all that time and effort on something that won't last!). Here are a few pictures of the process. 

The Morgan Rocker

The Morgan Rocker

All the parts necessary to build a rocker.  By this stage, the work is half done!

The first step is usually laminating the rockers.  These need to be very strong to withstand the stress of rocking, so I laminate several strips wood in this press and let the glue dry overnight.  This forms the shape, and the laminations give it incredible strength while allowing a thinner profile.  I could use solid wood, but to achieve the same strength they would need to be very bulky, which would detract from the look of the rocking chair.  The exact curvature of the form is important for a comfortable rocking motion.  This is where my strong math background came in handy!

These are planed to the correct thickness, small pieces are laminated to this profile to form the flowing joint up into the legs, then everything is rounded over to create the final profile.

Like the dining chairs, the back slats fit into mortises in the seat and the headrest.  A tight fit is very important here.  These slats were laminated, similar to the rockers, but I normally cut them from a solid slab of wood so I can vary the thickness along the curves for a better look.

The headrest and the armrests are the most challenging pieces to carve out, and they need to be perfect since that is the first place your hand reaches for!  The grain runs the same direction in the legs and the headrest, so it forms a very strong glue joint.  But for added strength, #14 steel screws are used to assemble (these are hidden under wood plugs that are barely visible in the finished rocking chair).

Fitting all the parts before final assembly.  Once the chair is assembled, the final shaping and sanding takes place (the most difficult process of all!!).

Assembled and roughly sanded.  This in a cherry rocker, while most of the pictures above have been walnut.  Cherry ages to a rich, dark reddish colour.  Walnut is a dark brown, but also gets a deep reddish tinge as it ages.  Both get more beautiful with age.

rocking chair cherry.JPG

A walnut chair again, showing the curve of the back slats and the outward taper of the back legs (exaggerated by the camera angle).  The slats cradle your back with just the right amount of curvature and flex to provide immediate relief to your stressed lumbar region.

photo 1.JPG